You are fully ready for this festive season. Your dress is checked, accessories checked, matching footwear checked. But aren’t you forgetting something? Nails. Don’t you think it will be an add on if you would have made your nails look beautiful? Just a simple nail polish is boring and very common. Let’s do something creative and different this season. NAIL ART. Now, are you thinking that it will take time and you will have to learn it from somewhere? Don’t worry. Nail art is not that difficult how it looks. Just a little patience and creativity, and you are set.
13 DIY Simple Nail Art Design For Festival:
So, Trabeauli has brought you some really cool and quirky, simple nail art design for this festive season at home. Check it out:-
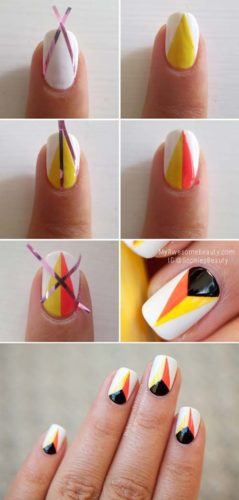
1. Flames Nail Art-
Now, looking at this design, one feels energetic and refreshing. It has got a great color combination, and I loved the design.P.S. You can always change the color combination according to your liking.
Apply two coats of white nail polish as a base coat.
Place two strips diagonally like V shape and apply yellow nail polish.
Now move one strip and stick in at half of the yellow nail polish, such that yellow nail polish is divided into half.
Apply orange nail polish on one half.
Now put the strips in cross sign and apply the black nail polish in the lower triangle.
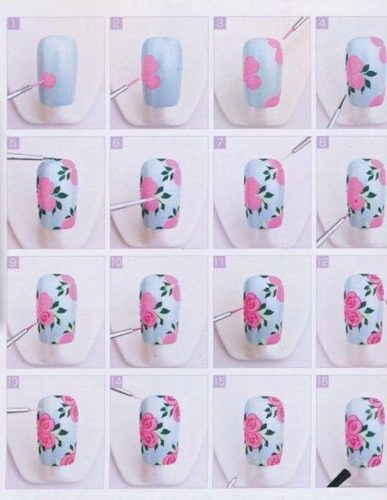
2. Floral Nail Art-
Don’t these nail design just look pretty and makes us feel about the beauty of nature. This spring design is sure to catch everyone’s attention. It will brighten up anyone’s day.How to do it:
After you have applied the base coat, apply the yellow nail polish on it.
Stick a nail art on ¾ of the yellow part and apply the peach nail polish diagonally.
Now apply the purple-pink nail polish diagonally across the way.
Give it a finished look by applying a topcoat.
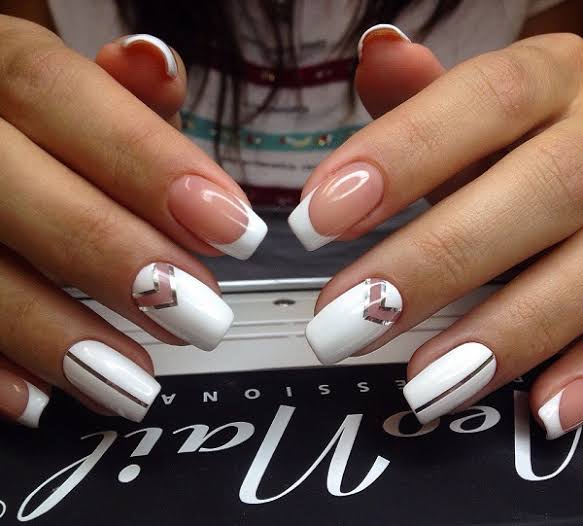
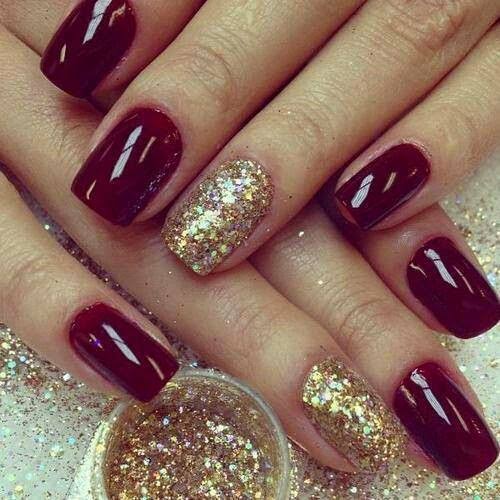
4. White Classic Nail Art-
This classy and stylish nail art design can never be out of fashion. White nail art goes with everything and takes beauty to another level. Its simple elegant nail art designs.How to do it:
Apply the maroon nail polish on all the fingers, except the ring finger. Apply golden glitter nail polish on that finger.
Apply the golden glitter nail polish on top of the middle finger and thumb, to give it an ombre effect. You can even use a sponge to apply the golden glitter nail polish.
For the index and little finger, take a thin nail striper and dip it in white color.
Draw two horizontal lines below the tip of your nails.
Give it a finished look by applying the clear top seal.
7. Santa on Nail Art-
How cool it will look if we draw Santa on our nails? Right.How to do it:
Later, paint your nails with grey-white nail polish.
Use thin strips, and apply tape to make a tree.
Apply green nail polish and then green glitter nail polish.
Place the gold star at the top of the tree.
Cover it up with a base coat.
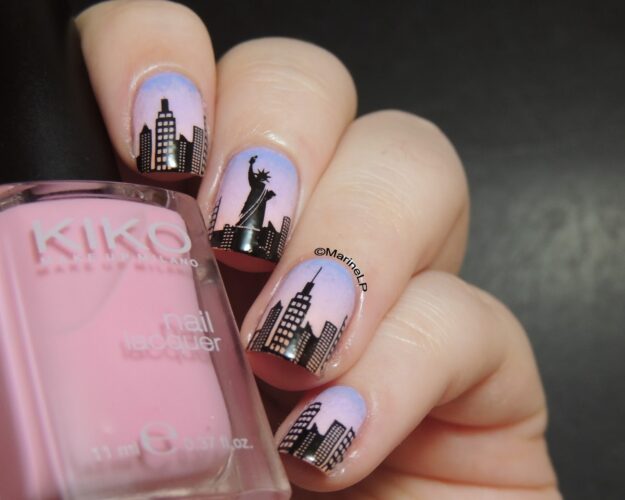
12. Indie Nails-
Image source: Pinterest
Indie nails are an amazing way to decorate your nails with your own creativity. In this, you can draw flowers, flames, any statues on your nails with the help of the black nail art pen.
How to do-
Just colour your nails with any base colour.
Double coat the colour.
With the help of a black nail art pen, draw any design you like.
You can also mix and match many colours for the attractive base colour.
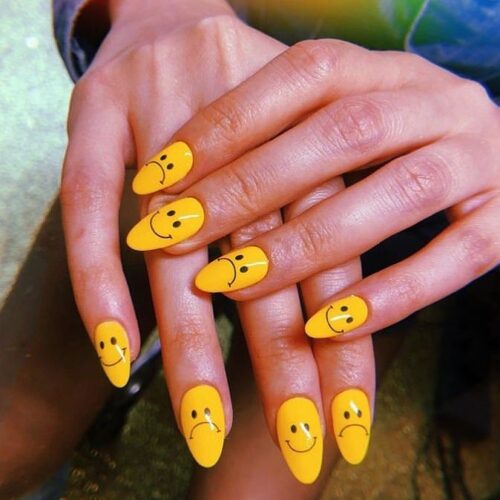
13. Smiley Face Nails-
Smiley has a great way of catching girls heart. We also use a smiley in our status and texts. So, why not try them on our nails. Yes, Smiley face nails are so much in trend these days, you can use different nails to tell about your mood with the help of smiley.
How to do:
Paint your nails with yellow colour
Double coat the paint.
With the help of black nail art pen, make eyes and a smiley face.
So, these are some of the amazingly cool and quirky, Simple Nail art design you can draw at home. Which one do you like best?
I am Arpita Dubey. I have done my MBA in marketing and international business. Later, I always wanted to try something of my own, where I have the flexibility to work and also the work interests me. That is when I started writing Content, I like to research and write content which is helpful for readers and also engages them. A mommy of a daughter, I took up the content writing as my full time job and I am loving it.

 Now, looking at this design, one feels energetic and refreshing. It has got a great color combination, and I loved the design.
P.S. You can always change the color combination according to your liking.
Now, looking at this design, one feels energetic and refreshing. It has got a great color combination, and I loved the design.
P.S. You can always change the color combination according to your liking.
 Don’t these nail design just look pretty and makes us feel about the beauty of nature. This spring design is sure to catch everyone’s attention. It will brighten up anyone’s day.
How to do it:
Don’t these nail design just look pretty and makes us feel about the beauty of nature. This spring design is sure to catch everyone’s attention. It will brighten up anyone’s day.
How to do it:
 This nail art is a treat for eyes. The vibrant colors of it make us feel young and energetic.
How to do it:
This nail art is a treat for eyes. The vibrant colors of it make us feel young and energetic.
How to do it:
 This classy and stylish nail art design can never be out of fashion. White nail art goes with everything and takes beauty to another level. Its simple elegant nail art designs.
How to do it:
This classy and stylish nail art design can never be out of fashion. White nail art goes with everything and takes beauty to another level. Its simple elegant nail art designs.
How to do it:
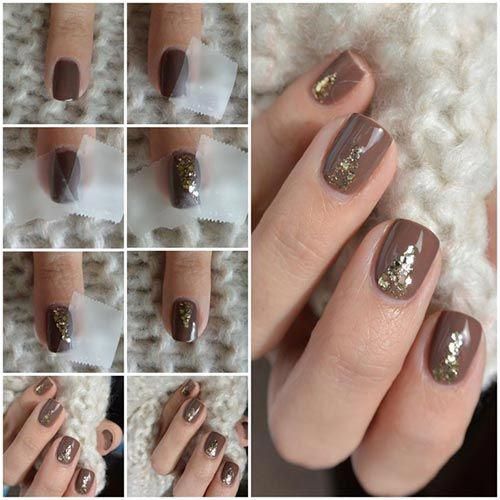 Oh! I just love this one. I am fond of the chocolate color. This brown combo looks heavenly beautiful.
How to do it:
Oh! I just love this one. I am fond of the chocolate color. This brown combo looks heavenly beautiful.
How to do it:
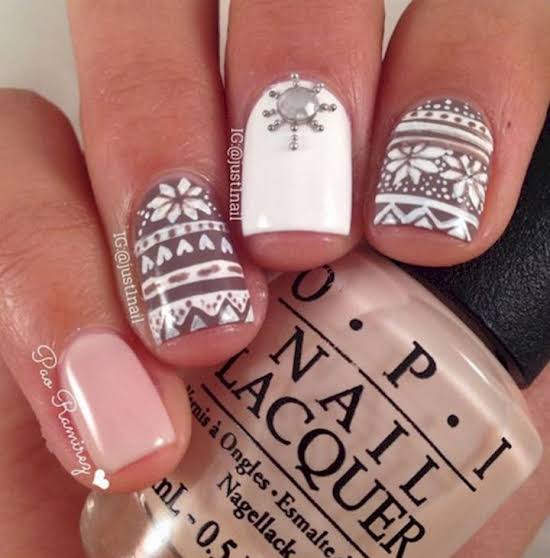
 Yay! It’s Christmas, and so it is a necessity to make our nails look a little Christmasy.
How to do it:
Yay! It’s Christmas, and so it is a necessity to make our nails look a little Christmasy.
How to do it:
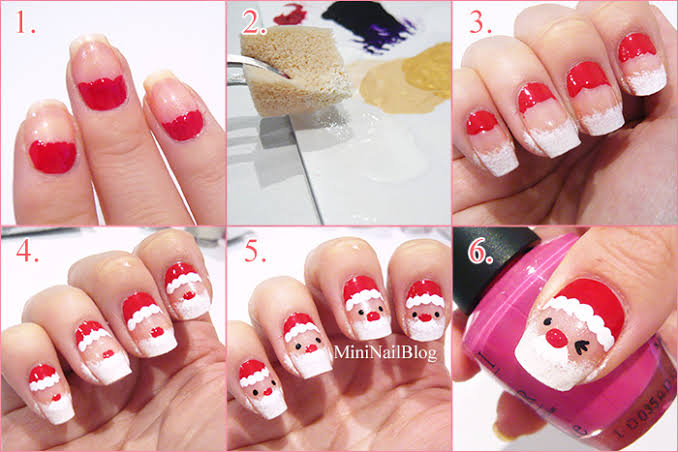 How cool it will look if we draw Santa on our nails? Right.
How to do it:
How cool it will look if we draw Santa on our nails? Right.
How to do it:
 How to do it:
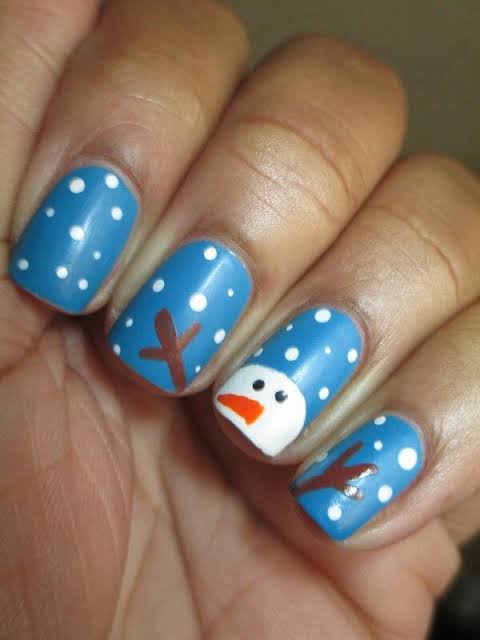 Ever thought of a snowman in the nails? Here we are, with this cute frosty looking snowman, it will give you full festive feeling.
How to do it:
Ever thought of a snowman in the nails? Here we are, with this cute frosty looking snowman, it will give you full festive feeling.
How to do it:
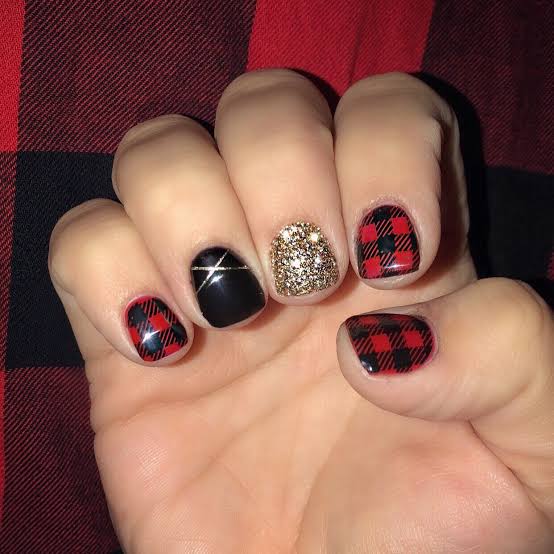
 This is something new and unique. Everyone will look at your nails twice, with this design.
How to do it:
This is something new and unique. Everyone will look at your nails twice, with this design.
How to do it:
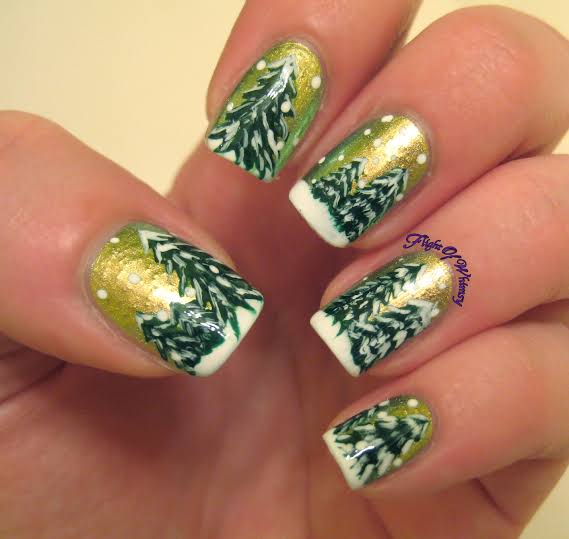 Christmas is incomplete without the pine tree. So, how about if we make the pine tree nail art.
How to do it:
Christmas is incomplete without the pine tree. So, how about if we make the pine tree nail art.
How to do it:


: Is This Memory Foam Pillow Worth It?")


")


Comments are closed.