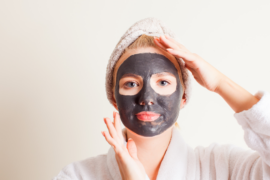
Oily skin can be a persistent challenge for many individuals, often leading to a range of frustrating issues. Those with this skin type frequently battle excess shine, enlarged pores, and an increased propensity for acne breakouts. Want to know how to do a facial at home?
The constant sebum production can leave the skin feeling greasy and looking overly shiny, particularly in the T-zone area. The best way to take care of oily skin is to try homemade facials for oily skin.
There are lot of struggles that oily skin people need to go through, struggle to keep their makeup in place throughout the day, and may find their skin texture to be coarser than desired.
All these things require special and how to do a facial at home step by step to keep the skin healthy and oil-free.
Check out homemade facials for oily skin
Benefits of Homemade Facial
Homemade facials offer several benefits for skin health and overall well-being:
1. Cost-effective:
Homemade facials are significantly less expensive than professional treatments, using ingredients you likely already have in your kitchen.
2. Natural ingredients:
They allow you to use all-natural ingredients without chemicals or preservatives, giving you control over what you put on your skin.
3. Skin improvement:
Homemade facials can help remove impurities, boost blood flow, and improve skin hydration. They can also address specific skin concerns like acne, hyperpigmentation, and dryness.
4. Customization:
You can tailor the ingredients to your specific skin type and concerns, such as using gentle cleansers for dry skin or oil-free options for acne-prone skin.
5. Relaxation and self-care:
Performing a facial at home provides an opportunity for relaxation and stress relief.
6. Convenience:
You can do a facial on your own schedule without having to visit a spa.
7. Exfoliation:
Homemade facials often include exfoliation steps that remove dead skin cells and unclog pores, improving skin texture.
8. Improved circulation:
Facial massage techniques used during home facials can enhance blood circulation and lymphatic drainage.
9. Regular skin maintenance:
A weekly DIY facial allows you to reset and recalibrate your skin, helping to maintain its health between professional treatments.
10. Education about your skin:
Regular home facials give you a chance to become more familiar with your skin’s needs and how it responds to different ingredients
How To Do a Facial at Home Step By Step
Preparation-
1. Gentle, oil-free cleanser:
This is crucial for removing surface oils, makeup, and impurities without stripping the skin or adding more oil. It sets a clean base for the rest of the facial.
2. Soft exfoliating scrub (optional):
While optional, a gentle exfoliant can help remove dead skin cells and unclog pores, which is particularly beneficial for oily skin. However, it’s important to use a soft scrub to avoid over-stimulating oil glands.
3. Bowl of hot water for steaming:
Steaming helps to open up pores, allowing for deeper cleansing and better absorption of subsequent treatments. It’s a simple yet effective step in any facial routine.
4. Natural mask ingredients:
- Clay (like bentonite or kaolin) is excellent for absorbing excess oil and drawing out impurities.
- Honey has antibacterial properties and can help balance the skin’s pH.
- Yogurt contains lactic acid, which gently exfoliates and moisturizes.
These natural ingredients provide effective treatment without harsh chemicals.
5. Soft towel:
A soft towel is necessary for the steaming process and for gently patting the skin dry after rinsing off masks or treatments.
6. Lightweight, oil-free moisturizer:
Even oily skin needs hydration. A lightweight, oil-free moisturizer helps to maintain the skin’s moisture balance without adding excess oil or clogging pores.
By gathering these supplies beforehand, you ensure a smooth, uninterrupted facial experience. This preparation allows you to focus on the treatment itself, maximizing its benefits for your oily skin.
Step By Step Facial at Home with natural ingredients
1. Cleansing:
Begin by thoroughly removing all makeup and dirt from your face. This crucial step ensures that subsequent treatments can penetrate effectively.
2. Exfoliation (optional):
Gently exfoliate to remove dead skin cells and unclog pores. Use a soft, circular motion and avoid harsh scrubbing, which can stimulate oil production.
3. Steam:
Fill a bowl with hot water and lean over it with a towel draped over your head. Steam for 5-10 minutes to open pores and prepare your skin for the mask.
4. Mask:
Apply a homemade mask tailored for oily skin. Here are two effective recipes:
Homemade Facial Face Mask for Oily Skin
a. Aloe vera Face Mask-
Aloe vera has astringent properties that help remove excess sebum and dirt, while turmeric’s anti-inflammatory properties help prevent oily skin.
DIY Face Mask:
- Take 1 tbsp. of Aloe vera gel
- Add ½ tbsp. of Turmeric in it.
- Mix the ingredients together.
- Apply the mask to your face
- Keep it for 30-45 minutes.
- Wash it off with lukewarm water.
b. Clay Face Mask-
Clay helps absorb excess oil and unclog pores, while witch hazel acts as an astringent to tighten pores.
DIY Face Mask:
- Take 1 tbsp. of Bentonite clay
- Mix it with Witch Hazel
- A paste is formed.
- Apply the paste and keep it for 10-15 minutes.
- Wash it off with lukewarm water.
c. Cucumber Face Mask-
Cucumbers help calm the skin and reduce oiliness, while mint has antibacterial properties that can help prevent acne
DIY Face Mask:
- Blend half a cucumber with a few mint leaves.
- Apply the mixture to your face.
- Leave it on for 15-20 minutes
- Rinse it off with cold water.
d. Oatmeal Face Mask-
Oatmeal and baking soda have exfoliating properties that can remove dead skin cells and unclog pores.
DIY Face Mask:
- Take 2 teaspoons of oatmeal
- Add 1 teaspoon of baking soda in it.
- Add a few drops of water to create a paste.
- Gently massage the paste over your face.
- Let the paste dry, then wash it off with warm water.
5. Massage (optional):
If desired, perform a gentle facial massage using a lightweight oil like jojoba. This can improve circulation and promote relaxation.
6. Rinse and Moisturize:
Remove the mask with lukewarm water and pat your face dry. Follow with a lightweight, oil-free moisturizer to hydrate without clogging pores
Bonus Tips On how to do a facial at home
Some of the bonus tips for homemade facials for oily skin are-
- Make sure you are not allergic to any ingredient.
- You can also use the DIY face mask alone.
- Give your face a full facial twice a month.
- Use a face mask once a week.
- Never skip moisturizer.
- Do not rub your face harshly.
- Never skip sunscreen.
Conclusion On how to do a facial at home
In conclusion, regular homemade facials for oily skin can significantly improve oily skin by balancing oil production, deep-cleaning pores, and promoting a healthy glow. By using natural ingredients and following these steps, you can achieve clearer, more balanced skin without harsh chemicals or expensive treatments. Embrace the power of DIY skincare and enjoy the journey to healthier, more radiant skin.
FAQ
1. How often should the homemade facial be done?
Homemade facial should be done once a week, but if you have got sensitive skin, then the facial should be once in a month.
2. Is it good to use a store-bought face mask for oily skin?
Yes, if you do not have time to make a homemade face mask, you can always use store-bought face masks for oily skin.


Comments are closed.